The Asylum Grounds: Difference between revisions
DansFriend (talk | contribs) m (97 revisions imported) |
DansFriend (talk | contribs) |
||
| (15 intermediate revisions by the same user not shown) | |||
| Line 1: | Line 1: | ||
{{Infobox level | {{Infobox level | ||
|name = The Asylum Grounds | |name = The Asylum Grounds | ||
|image = MediEvil1998-TheAsylumGrounds-LoadingScreen.png | |||
|image = | |image2 = MediEvil2019-TheAsylumGrounds-LoadingScreen.png | ||
|chalice = Yes | |chalice = Yes | ||
|enemies = [[Mad Monks]], [[Hedge Sculptures]] | |enemies = [[Mad Monks]], [[Hedge Sculptures]] | ||
|plevel = [[The Sleeping Village]] | |plevel = [[The Sleeping Village]] | ||
|nlevel = [[Inside | |nlevel = [[Inside The Asylum]] | ||
| | |music = [[MediEvil/Music#18|IG9]] | ||
| | |music2019 = [[You Don't Know Jack]]<br>[[Jawless Arrow Magnet]] | ||
|fmvbefore = [[6AV]] | |||
}} | }} | ||
{{ | {{LocationMediEvil | ||
|bgposition = 82% 36% | |||
|southwest = [[The Sleeping Village]] | |southwest = [[The Sleeping Village]] | ||
|northeast = [[Inside | |northeast = [[Inside The Asylum]]}}{{Trophies| | ||
{{Trophy/MediEvil|King of Cups}} | |||
{{Quote|You dare challenge Jack of the Green? For someone without skin, you've got a lot of nerve!}} | }} | ||
{{Quote|You dare challenge Jack of the Green? For someone without skin, you've got a lot of nerve!|Loading screen description}} | |||
'''The Asylum Grounds''' is a level in ''[[MediEvil (1998)|MediEvil]]''. It is not available in ''[[MediEvil: Resurrection]]''. [[Daniel]] encounters the master of the maze, [[Jack of the Green]], who promises to reward him if he solves his riddles. | |||
==Walkthrough== | ==Walkthrough== | ||
=== | {{Empty section}} | ||
==Book of Gallowmere== | |||
===Friendlies=== | |||
<gallery> | |||
MediEvil2019-JackOfTheGreen-BookOfGallowmere.png|link=Jack of the Green|alt=Jack of the Green|[[Jack of the Green]] | |||
MediEvil2019-MerchantGargoyles-BookOfGallowmere.png|link=Merchant Gargoyle|alt=Merchant Gargoyle|[[Merchant Gargoyle]] | |||
</gallery> | |||
===Enemies=== | |||
*[[Hedges]] | |||
*[[Mad Monks]] | |||
==Inventory== | |||
===Armour=== | |||
== | |||
=== | |||
*[[Silver Shield]] | *[[Silver Shield]] | ||
===[[ | ===Items=== | ||
*[[Chalice of Souls]] | |||
*[[Chaos Rune]] | *[[Chaos Rune]] | ||
=== | ===Treasure=== | ||
*5 [[Moneybags]] | *5 [[Moneybags]] | ||
=== | ===Energy=== | ||
*2 [[Energy Vial]]s | *2 [[Energy Vial]]s | ||
==Speech== | ==Speech== | ||
| Line 154: | Line 66: | ||
==Books== | ==Books== | ||
{{Main| | {{Main|Books in MediEvil|l1=Books in MediEvil}} | ||
=====Book 1===== | =====Book 1===== | ||
This is the garden of Zarok, nothing here is as it first seems. To leave this maze you must first seek out the one called Jack of the Green! | This is the garden of Zarok, nothing here is as it first seems. To leave this maze you must first seek out the one called Jack of the Green! | ||
| Line 161: | Line 73: | ||
=====Book 3===== | =====Book 3===== | ||
Solve this last puzzle and you will open the secret entrance to the asylum - the Town Mayor is imprisoned here, along with an army of madmen. | Solve this last puzzle and you will open the secret entrance to the asylum - the Town Mayor is imprisoned here, along with an army of madmen. | ||
==Development== | |||
===''MediEvil: Resurrection''=== | |||
According to ''[[MediEvil: Resurrection]]'''s designer, [[Dominic Cahalin]], the level was set to appear in the game. The level was eventually cut due to time constraints.{{Siteref|MediEvil-Boards|13269|MediEvil developers - Q&A;|August 4, 2013|quote=Initially we had planned two additional levels for Resurrection (I completed the revised paper design for them). These were the asylum grounds and the Crystal Caves (both based loosely on the levels from the original games). These were cut out due to development time restrictions, which was a real shame, as they had some cool new play mechanics and character designs. The launch of the PSP was eventually delayed by Sony by 6 months, which meant that we could easily have finished the game with all the levels :(}} | |||
==Gallery== | ==Gallery== | ||
{{ | {{Main|:Category:Images of The Asylum Grounds|l1=Images of The Asylum Grounds}} | ||
{{Empty section}} | |||
==In other languages== | |||
===''MediEvil'' (1998 original)=== | |||
{{Empty section|Languages}} | |||
| | ===''MediEvil'' (2019 remake)=== | ||
{{OtherLanguages | |||
|ar = ”أراضي المصحة” | |||
|arR = "'aradi almasahati" | |||
|bg = Двора на лудницата | |||
|bgR = Dvora na ludnitsata | |||
|cz = Okolo blázince | |||
|da = Galehusets Område | |||
|de = Das Anstaltsgelände | |||
|el = Το Άσυλο | |||
|elR = To Ásylo | |||
|elM = The Asylum | |||
|es = Los Jardines del manicomio | |||
|esMX = Terrenos del Manicomio | |||
|fi = Mielisairaalan piha | |||
|fr = Domaines de l'Asile | |||
|hr = Teren ludnice | |||
|hu = A bolondokháza parkja | |||
|it = Il parco del Manicomio | |||
|ja = 迷宮のジャック | |||
|jaR =Meikyū no jakku | |||
|jaM = Jack's Maze | |||
|nl = Het gestichtsterrein | |||
|no = Asylumsletta | |||
|pl = Teren szpitala dla obłąkanych | |||
|pt = Recinto do Asilo | |||
|ptBR = O Manicômio | |||
|ptBRM = The Asylum | |||
|ro = Domeniul Ospiciului | |||
|ru = Окрестности сумасшедшего дома | |||
|ruR =Okrestnosti sumasshedshego doma | |||
|sv = Gården runt hospitalet | |||
|tr = Tımarhane Arazisi | |||
}} | }} | ||
==See also== | ==See also== | ||
*{{Icon| | *{{Icon|Demo}} [[MediEvil Rolling Demo/The Asylum Grounds|The Asylum Grounds]] in the ''[[MediEvil Rolling Demo]]''. | ||
==References== | |||
{{Reflist}} | |||
==Navigation== | |||
{{MediEvil levels}} | {{MediEvil levels}} | ||
{{MediEvil: Resurrection cut content}} | |||
{{DEFAULTSORT:Asylum Grounds, The}} | {{DEFAULTSORT:Asylum Grounds, The}} | ||
[[Category:Levels]] | [[Category:Levels]] | ||
[[Category:MediEvil | [[Category:Levels in MediEvil]] | ||
[[Category:Content cut from MediEvil: Resurrection]] | |||
Latest revision as of 20:20, 6 March 2024
| The Asylum Grounds | ||
|---|---|---|
 
| ||
| General information | ||
| Chalice | Yes | |
| Enemies | Mad Monks, Hedge Sculptures | |
| Music (original) | IG9 | |
| Music (remake) | You Don't Know Jack Jawless Arrow Magnet | |
| FMV before level | 6AV | |
| Chronological information | ||
| Previous level | The Sleeping Village | |
| Next level | Inside The Asylum | |
| Location on Land Map | ||||
|---|---|---|---|---|
| Inside The Asylum | ||||
| ↗ | ||||
| ↙ | ||||
| The Sleeping Village | ||||
| Trophies | |
|---|---|
Collect all the chalice rewards. | |
|
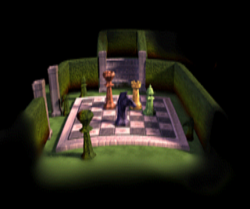
The Asylum Grounds is a level in MediEvil. It is not available in MediEvil: Resurrection. Daniel encounters the master of the maze, Jack of the Green, who promises to reward him if he solves his riddles.
Walkthrough
|
Book of Gallowmere
Friendlies
Enemies
Inventory
Armour
Items
Treasure
Energy
Speech
- Main article: Speeches in MediEvil
Jack of the Green
First visit
| 48 | Jack of the Green | Greetings Sir Fortesque, my name is... Jack of the Green. I am the master of riddles and this maze is my domain. You are free to leave but ONLY once you've answered four riddles - puzzles so fiendishly difficult, so perplexingly complex that no man has ever solved them - ha, ha, ha. Now try my first riddle.. At night they come without being fetched; By day they are lost without being stolen. |
First riddle
| 49 | Jack of the Green | At night they come without being fetched; By day they are lost without being stolen. |
First riddle solved
| 53 | Jack of the Green | Well done, Sir Knight. But my Star Riddle was but a trifle - I always like to begin with an easy one. Return hither - you will not find my next conundrum so simple! |
Second riddle
| 50 | Jack of the Green | I live for laughter I live for the crowd, Without it I am nothing. |
Second riddle solved
| 54 | Jack of the Green | All right, yes it was a clown - very clever I'm sure. Return in haste, Sir knight, for I wish to see the despair on your face when you hear my next cryptic puzzler. |
Third riddle
| 51 | Jack of the Green | Face like a tree, Skin like the sea, A great beast I be, Yet vermin frighten me! |
Third riddle solved
| 55 | Jack of the Green | Did you spot my bluff? I pretended that riddle was hard but in truth it was obviously an elephant. This time, however, I almost pity you: the answer to my next vexing enigma has eluded the finest minds of a whole generation. Come to me! |
Fourth riddle
| 52 | Jack of the Green | I tolerate the moon and stars, I can't abide the sun, Banish me with torch light And you'll see me turn and run. |
Fourth riddle solved
| 56 | Jack of the Green | Blast you! It took me ages to come up with that Darkness one! Very well, outrageous as it seems, my vast intellect has been matched by your badly decomposed brain. Return at once and I shall give you your prize. |
Last visit
| 57 | Jack of the Green | You think you're so clever don't you? Here you are Sir Clever Clogs, I grant you free passage through my maze - find your own way out! |
Books
- Main article: Books in MediEvil
Book 1
This is the garden of Zarok, nothing here is as it first seems. To leave this maze you must first seek out the one called Jack of the Green!
Book 2 (US only)
Show the Clown you care by surrounding him with smiles.
Book 3
Solve this last puzzle and you will open the secret entrance to the asylum - the Town Mayor is imprisoned here, along with an army of madmen.
Development
MediEvil: Resurrection
According to MediEvil: Resurrection's designer, Dominic Cahalin, the level was set to appear in the game. The level was eventually cut due to time constraints.[1]
Gallery
- Main article: Images of The Asylum Grounds
|
In other languages
MediEvil (1998 original)
|
MediEvil (2019 remake)
| Language | Name | Meaning |
|---|---|---|
| Arabic | ”أراضي المصحة” "'aradi almasahati" |
- |
| Bulgarian | Двора на лудницата Dvora na ludnitsata |
- |
| Croatian | Teren ludnice | - |
| Czech | Okolo blázince | - |
| Danish | Galehusets Område | - |
| Dutch | Het gestichtsterrein | - |
| Finnish | Mielisairaalan piha | - |
| French (France) | Domaines de l'Asile | - |
| German | Das Anstaltsgelände | - |
| Greek | Το Άσυλο To Ásylo |
The Asylum |
| Hungarian | A bolondokháza parkja | - |
| Italian | Il parco del Manicomio | - |
| Japanese | 迷宮のジャック Meikyū no jakku |
Jack's Maze |
| Norwegian | Asylumsletta | - |
| Polish | Teren szpitala dla obłąkanych | - |
| Portuguese (Brazil) | O Manicômio | The Asylum |
| Portuguese (Portugal) | Recinto do Asilo | - |
| Romanian | Domeniul Ospiciului | - |
| Russian | Окрестности сумасшедшего дома Okrestnosti sumasshedshego doma |
- |
| Spanish (LatAm) | Terrenos del Manicomio | - |
| Spanish (Spain) | Los Jardines del manicomio | - |
| Swedish | Gården runt hospitalet | - |
| Turkish | Tımarhane Arazisi | - |
See also
References
- ↑
 "Initially we had planned two additional levels for Resurrection (I completed the revised paper design for them). These were the asylum grounds and the Crystal Caves (both based loosely on the levels from the original games). These were cut out due to development time restrictions, which was a real shame, as they had some cool new play mechanics and character designs. The launch of the PSP was eventually delayed by Sony by 6 months, which meant that we could easily have finished the game with all the levels :(" — MediEvil developers - Q&A; on MediEvil Boards. Published August 4, 2013.
| ||||||||||||||

