|
|
| (17 intermediate revisions by 2 users not shown) |
| Line 1: |
Line 1: |
| {{DISPLAYTITLE:Pools of the Ancient Dead}} | | {{Pagination|[[Pools Of The Ancient Dead|MediEvil]]|[[Pools Of The Ancient Dead (MediEvil: Resurrection)|MediEvil: Resurrection]]}} |
| | | {{Infobox level |
| {{Template:Infobox level
| | |name = Pools Of The Ancient Dead |
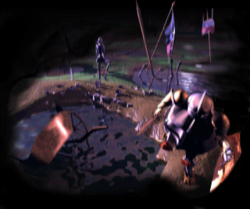
| |aka = The Swamps, Flood lands | | |image = MediEvil1998-PoolsOfTheAncientDead-LoadingScreen.png |
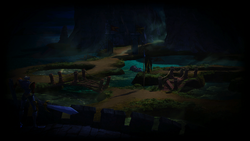
| |name = [[Speedrunning:Pools of the Ancient Dead|<font color=#a61800>Pools of the Ancient Dead</font>]] | | |image2 = MediEvil2019-PoolsOfTheAncientDead-LoadingScreen.png |
| |nav = {{LevelNav|PSX=Pools of the Ancient Dead (MediEvil)|PSP=Pools of the Ancient Dead (Resurrection)}}
| |
| |image = <gallery> | |
| MedPS4PoolsoftheAncientDead.png|2019
| |
| Pools_of_the_Ancient_Dead.png|1998
| |
| </gallery>
| |
| |chalice = Yes | | |chalice = Yes |
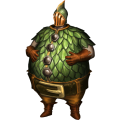
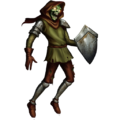
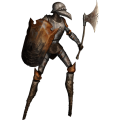
| |enemies = [[Ghouls]], [[Tentacles]], [[Armoured Knights]], [[Undead Warriors]] | | |enemies = [[Ghouls]], [[Tentacles]], [[Armoured Knights]], [[Mud Knights]] |
| | |levelnumber = 14. |
| |nlevel = [[The Lake]] | | |nlevel = [[The Lake]] |
| |plevel = [[The Enchanted Earth]] | | |plevel = [[The Enchanted Earth]] |
| |track = [[MediEvil/Music#IG6|IG6]] (1998)<br>[[Necromancer's Finest]] (2019) | | |music = [[MediEvil/Music#IG6|IG6]] |
| |fmv = [[5AV]] | | |music2019 = [[Necromancer's Finest]] |
| |walkthrough1998 = MediEvil - Pools of the Ancient Dead
| | |fmvbefore = [[5AV]] |
| |walkthrough1998author = [https://www.youtube.com/user/iCABALi iCABALi]
| |
| |walkthrough2019 = [[File:MediEvil PS4 Remake Walkthrough Part 14 - Pools of the Ancient Dead All Collectibles|thumb|center|335 px]]
| |
| |walkthrough2019author = [https://www.youtube.com/channel/UCQXI4dGbasH2nMOzZRB2Heg BlackFox2240]
| |
| }} | | }} |
| {{Location | | {{LocationMediEvil |
| | |bgposition = 52% 39% |
| |southwest = [[The Enchanted Earth]] | | |southwest = [[The Enchanted Earth]] |
| |northwest = [[The Lake]]}} | | |northwest = [[The Lake]]}} |
| {{Quote|The Battle of Gallowmere is long past, but an army of the undead still marches through these muddy plains. Try not to trip on your own grave!}} | | {{Trophies| |
| | | {{Infobox header|''MediEvil'' (1998 original)|colspan=2}} |
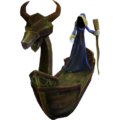
| {{nihongo|'''Pools of the Ancient Dead'''|死者たちの沼|Shisha-tachi no numa}} is the fourteenth level in ''[[MediEvil]]''. It is where the [[Battle of Gallowmere]] was fought against [[Zarok]], 100 years prior to the events of ''MediEvil''; presumably, it was here where Sir Dan was killed. It has since become inundated with large quantities of water, converting it into a swamp, filled with undead soldiers. Dan talks to the [[Boat Man]] here, who says he will take Dan to the sunken town of [[Mellowmede]] if Dan brings him eight [[Soul Helmet|lost souls]].
| | {{!}}- |
| | {{Trophy/MediEvil (1998)|King of Cups}} |
| | {{Trophy/MediEvil (1998)|Healthiest Man Alive - Er Dead}} |
| | {{Trophy/MediEvil (1998)|Sneaky}} |
| | {{!}}- |
| | {{Infobox header|''MediEvil'' (2019 remake)|colspan=2}} |
| | {{!}}- |
| | {{Trophy/MediEvil|King of Cups}} |
| | {{Trophy/MediEvil|Healthiest Man Alive - Er Dead}} |
| | {{Trophy/MediEvil|Deathly Smorgasbord}} |
| | }} |
| | {{Quote|The Battle of Gallowmere is long past, but an army of the undead still marches through these muddy plains. Try not to trip on your own grave!|Loading screen description}} |
| | '''Pools Of The Ancient Dead''' is the fourteenth level in ''[[MediEvil]]''. It is where the [[Battle of Gallowmere]] was fought against [[Zarok]], 100 years prior to the events of ''MediEvil''; presumably, it was here where Sir Dan was killed. It has since become inundated with large quantities of water, converting it into a swamp, filled with undead soldiers. Dan talks to the [[Boat Man]] here, who says he will take Dan to the sunken town of [[Mellowmede]] if Dan brings him eight [[Soul Helmet|lost souls]]. |
|
| |
|
| ==Walkthrough== | | ==Walkthrough== |
| ===''Walkthrough by [https://www.gamefaqs.com/community/Mirrorstar/contributions Mirrorstar]''===
| | {{Empty section|Walkthrough}} |
| The biggest danger of this area is falling into the water
| |
| which drains what is in your life meter. Be careful as you
| |
| walk and jump.
| |
|
| |
|
| You start off on a decent sized patch of ground. Walk down
| | ==Book of Gallowmere== |
| to find a BAG OF COINS. Then go up and talk to the GARGOYLE.
| | ===Friendlies=== |
| | | <gallery> |
| Walk across the wooden bridge and find the FIRST BOOK,
| | MediEvil2019-InformationGargoyles-BookOfGallowmere.png|link=Information Gargoyle|alt=Information Gargoyle|[[Information Gargoyle]] |
| which is the only book.
| | MediEvil2019-KulKatura-BookOfGallowmere.png|link=Kul Katura the Serpent Lord|alt=Kul Katura the Serpent Lord|[[Kul Katura the Serpent Lord|Kul Katura]] |
| | | MediEvil2019-MerchantGargoyles-BookOfGallowmere.png|link=Merchant Gargoyle|alt=Merchant Gargoyle|[[Merchant Gargoyle]] |
| Walk around to the right, or left, so you can jump up the
| | </gallery> |
| steps. There you will find an ENERGY VIAL. Follow the stone
| | ===Enemies=== |
| path onward. To the right of the path, you should see
| | <gallery> |
| something is in the water. As you approach it, it will
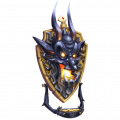
| | MediEvil2019-ArmouredKnights-BookOfGallowmere.png|link=Armoured Knights|alt=Armoured Knights|[[Armoured Knights]] |
| become a tentacle that will attack you. You can fight back
| | MediEvil2019-Ghoul-BookOfGallowmere.png|link=Ghouls|alt=Ghouls|[[Ghouls]] |
| if you wish, but such tentacles do not count towards your
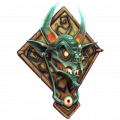
| | MediEvil2019-MudKnights-BookOfGallowmere.png|link=Mud Knights|alt=Mud Knights|[[Mud Knights]] |
| Chalice percentage.
| | MediEvil2019-Tentacles-BookOfGallowmere.png|link=Tentacles|alt=Tentacles|[[Tentacles]] |
| | | </gallery> |
| When you have a choice, go to the left. The path stops, but
| | ===Not in the book=== |
| there is a stone platform not far from you. Run towards it
| | <gallery> |
| and jump to do a running jump and land on that platform.
| | MediEvil2019-TheBoatMan-Render.png|link=The Boat Man|alt=The Boat Man|[[The Boat Man]] |
| (When doing running jumps, try to time it so you jump at the
| | </gallery> |
| very last moment so that you can get the most distance.) The
| |
| Boat Man will speak to you. You are given your task to
| |
| gather eight lost souls.
| |
| | |
| Do a running jump back to the path. You will notice a zombie
| |
| in a large suit of armor. You need to use your weapon to
| |
| force such zombies into the swamp where they will sink. They
| |
| do count towards your Chalice percentage.
| |
| | |
| Walk to the corner where you have to go left. You will pass
| |
| another tentacle. Jump up onto the round corner. Continue
| |
| to a rectangular area with a MERCHANT GARGOYLE at the end of
| |
| it. To the right is a path. Do a running jump to reach it.
| |
| Walk along it to the ground. Be careful of the tentacle to
| |
| the right of that path. Walk forward toward the FOUNTAIN,
| |
| and be careful of the tentacle in the pool to the right.
| |
| | |
| Once at the Fountain, walk to the right. You will notice
| |
| gold bridges connect a lot of the land. Take note that each
| |
| time you find a lost soul, some of those bridges will
| |
| disappear. Once you have all the lost souls, no such bridges
| |
| will be left.
| |
| | |
| You should see a chest with a skull and crossbones. Feel
| |
| free to break it open and release KUL KATURA. Remember, you
| |
| cannot control this serpent and it will only exist here for
| |
| a limited amount of time.
| |
| | |
| Cross over using the gold bridge to the right. Look around
| |
| for another chest with a skull and crossbones and walk
| |
| towards it. Be very careful if you hit it as it has a time
| |
| bomb. Even if you are at a relatively safe distance from
| |
| the bomb when it explodes, it can still push you.
| |
| | |
| With that chest in front of you, go to the left. You should
| |
| see a bag on an island. Do a walking jump to reach the BAG
| |
| OF COINS. Then, you may want to try to do a running jump to
| |
| return to where you were. (A running jump to that island may
| |
| go too far, but a running jump from the island makes it more
| |
| likely you will successfully make it across.) You should see
| |
| a yellow object. Make a running jump to reach your first
| |
| SOUL HELMET. Return to the chest with the time bomb.
| |
| | |
| This time, with that chest in front of you, go towards the
| |
| right and pick up the CHAOS RUNE. Then, look around yourself
| |
| until you see the Chalice in the distance. Walk towards the
| |
| Chalice.
| |
| | |
| Very near the Chalice, walk over a gold bridge. This brings
| |
| you to a tree with two shields on it. Take the second SOUL
| |
| HELMET. Also, take the ENERGY VIAL. Since both bridges are
| |
| gone, just to be safe, with the tree in front of you and the
| |
| Chalice behind you, go to the left.
| |
| | |
| Walk towards and then past the Chalice. Ignore any ways to
| |
| the right and keep going until you find the third SOUL
| |
| HELMET. Then, the bridges vanish. While at the flag, where
| |
| you found the Soul Helmet, you should see a path to the
| |
| right. This path has a pointed end. With the flag to your
| |
| left, do a running jump to jump onto the path. Follow it
| |
| back to the stone path which leads back to the Merchant
| |
| Gargoyle.
| |
| | |
| With that stone path to the left, walk forward and take the
| |
| first right. You should see a chest with a skull and
| |
| crossbones. In it is a time bomb. Set it off at your own
| |
| risk. You should also see the fourth SOUL HELMET, so take
| |
| it. (If you walk to the Soul Helmet without going over the
| |
| gold bridge, be careful while walking in-between the poles.)
| |
| | |
| With where you just took the Soul Helmet behind you, walk
| |
| forward and walk to the right across the first gold bridge
| |
| you find. This leads you onto an oval area with an ENERGY
| |
| VIAL. The way is narrow, so proceed with caution. Then,
| |
| cross back over that bridge.
| |
| | |
| You should see an area with a lot of chests that all have a
| |
| skull and crossbones on them. You want to take care of them
| |
| while the gold bridge for this is still present. Center on
| |
| the chest which is near the tree. You should just have to
| |
| run in a straight line across the gold bridge to reach it.
| |
| Trigger it. Then run back across the bridge. That should
| |
| set up a chain reaction which will explode most or even all
| |
| of those chests for you. Then you will not have to worry
| |
| about them.
| |
| | |
| With that gold bridge you just ran across in front of you,
| |
| go left and up. You should find a SILVER SHIELD in a chest.
| |
| Not far away is your fifth SOUL HELMET.
| |
| | |
| From where you found the Soul Helmet, you should see an
| |
| isolated piece of ground. Do a walking jump to it. From
| |
| there, do a walking jump to the area with a large tree with
| |
| two shields on it. (This is the area with all the chests
| |
| from earlier.) You should see the sixth SOUL HELMET in front
| |
| of you, so take it.
| |
| | |
| Keep going to find a gate. Walk into the red hand to use the
| |
| Chaos Rune. As you walk forward, the view will shift so the
| |
| two chariots are at the bottom of the screen. In this view,
| |
| you need to look towards the left. You should see treasure
| |
| on the island in that direction. Keep close to the wall and
| |
| do a running jump to that island. There you will find a
| |
| CHEST OF COINS, another CHEST OF COINS, an ENERGY VIAL,
| |
| another ENERGY VIAL, and a LIFE BOTTLE. Be careful of the
| |
| tentacle. Again, staying close to the wall, do a running
| |
| jump back to the area with the chariots.
| |
| | |
| Next to the chariots is the seventh SOUL HELMET. Taking it
| |
| will trigger some enemies to appear. Walk past the chariots
| |
| and down the path. Be careful of the chariots as they will
| |
| roll down after you. At the bottom of the path, you will
| |
| find an ENERGY VIAL, another ENERGY VIAL, and the eighth and
| |
| final SOUL HELMET. When you take it, enemies will appear and
| |
| the exit will close. I would advise you deal with the thin
| |
| zombies with the throwing weapons first and then deal with
| |
| pushing the fat zombies over the edge. Kill them all to
| |
| open the exit.
| |
| | |
| Run back up the path. Last, you need to fill up your
| |
| Chalice. Consider using some sort of distance weapon as
| |
| flying monsters have appeared. Walk out of the gates that
| |
| needed the Chaos Rune. Keep to the right as you walk. Do a
| |
| walking jump back to that isolated piece of ground. Do
| |
| another walking jump to go back to where you see a broken
| |
| chest on the ground, where you got the Silver Shield
| |
| earlier.
| |
| | |
| Go to the left and then stay next to the right edge to
| |
| return to the stone path that leads back to the Merchant
| |
| Gargoyle. Keep walking past the stone path, while staying
| |
| along the right edge, until you are at the path with a point
| |
| at the end of it. There are two other areas near it. Make a
| |
| running jump to the one with the square end which has no
| |
| grass on it. Once there, walk to the far end of this path
| |
| and make a running jump towards an area with a chest, which
| |
| has or had a time bomb. With the chest in front of you, go
| |
| to the right. Then look around and you should be able to
| |
| walk into the CHALICE.
| |
| | |
| Walk back to the last chest mentioned. With it behind you,
| |
| do a running jump onto the next piece of ground. Walk
| |
| forward and do a running jump onto the pointed piece of
| |
| ground. Then go to the right and keep close to the left edge
| |
| until you are back at the stone path. Walk up it. Do a
| |
| running jump off of the end of it to return to the Merchant
| |
| Gargoyle.
| |
| | |
| Walk away from the Merchant Gargoyle. Jump up onto the round
| |
| corner. Follow the path to the right. As you turn on the
| |
| next corner, ignore the way you see to the side and walk to
| |
| the end of the path. Do a running jump back to the platform.
| |
| | |
| Once at the Boat Man, use the Soul Helmet from your
| |
| inventory and he will give you a ride.
| |
| | |
| ==[[Book of Gallowmere]]== | |
| ===[[:Category:Friendlies|Friendlies]]=== | |
| {{MobileLayout|desktop=
| |
| {{{!}} border="1" cellpadding="1" cellspacing="1" class="article-table" style="margin-right:auto;"
| |
| {{BestiaryEntry|Information Gargoyle}}
| |
| {{BestiaryEntry|Merchant Gargoyle}}
| |
| {{BestiaryEntry|Kul Katura the Serpent Lord}}
| |
| {{!}}}
| |
| |mobile= | |
| {{BestiaryEntry|Information Gargoyle|mobile}}
| |
| {{BestiaryEntry|Merchant Gargoyle|mobile}}
| |
| {{BestiaryEntry|Kul Katura the Serpent Lord|mobile}}
| |
| }}
| |
| | |
| ===[[:Category:Enemies|Enemies]]=== | |
| {{MobileLayout|desktop=
| |
| {{{!}} border="1" cellpadding="1" cellspacing="1" class="article-table" style="margin-right:auto;"
| |
| {{BestiaryEntry|Armored Knights}}
| |
| {{BestiaryEntry|Mud Knights}}
| |
| {{BestiaryEntry|Ghouls}}
| |
| {{BestiaryEntry|Tentacles}}
| |
| {{!}}}
| |
| |mobile= | |
| {{BestiaryEntry|Armored Knights|mobile}}
| |
| {{BestiaryEntry|Mud Knights|mobile}}
| |
| {{BestiaryEntry|Ghouls|mobile}}
| |
| {{BestiaryEntry|Tentacles|mobile}}
| |
| }}
| |
|
| |
|
| | ==Inventory== |
| | {{Empty section}} |
| | ==Intermissions== |
| | {{Empty section}} |
| ==Books== | | ==Books== |
| {{Template:Main|MediEvil_books|l1=MediEvil books}} | | {{Main|Books in MediEvil}} |
| =====Book 1=====
| | ===Book 1=== |
| Weapons are useless against the heavy armour of the knights. Don't let them shove you in the swamp - that mud will never come out. | | Weapons are useless against the heavy armour of the knights. Don't let them shove you in the swamp - that mud will never come out. |
|
| |
| ==Gallery== | | ==Gallery== |
| {{Gallery|artwork= | | {{Empty section|Gallery}} |
| <gallery columns="4" orientation="portrait" spacing="small" widths="150" hideaddbutton="true" bordercolor="accent" captionsize="medium" captionalign="center">
| | ==In other languages== |
| Armoured Knights Concept Art.jpg
| | ===''MediEvil'' (1998 original)=== |
| Crystal20cavern enemies small.jpg
| | {{Empty section|Languages}} |
| MediEvilghoul and fatknight art.jpg
| | ===''MediEvil'' (2019 remake)=== |
| Fat Knight Movements.jpg
| | {{OtherLanguages |
| MudKnight concept.png
| | |ar = ”برك الموتى القدامى” |
| Med10_small.jpg
| | |arR ="brak almawtaa alqudamaa" |
| </gallery>
| | |bg = Блатата на древните мъртви |
| |screenshots= | | |bgR =Blatata na drevnite mŭrtvi |
| <gallery columns="4" orientation="portrait" spacing="small" widths="150" hideaddbutton="true" bordercolor="accent" captionsize="medium" captionalign="center">
| | |cz = Tůně starých mrtvých |
| PD8.PNG
| | |da = De Gamle Dødes Vandhuller |
| PD1.PNG
| | |de = Totentümpel |
| PD5.PNG
| | |el = Οι Βάλτοι των Αρχαίων Νεκρών |
| PD7.PNG
| | |elR =Oi Váltoi ton Archaíon Nekrón |
| PD3.PNG
| | |es = Las Ciénagas de los antiguos muertos |
| PD2.PNG
| | |esMX = Ciénagas de los Muertos Antiguos |
| PD6.PNG
| | |fi = Muinaiskalmojen altaat |
| PD4.PNG
| | |fr = Zone des Anciens défunts |
| </gallery>
| | |hr = Mlake drevnih mrtvih |
| | |hu = A rég holtak tavai |
| | |it = Le paludi dei morti viventi |
| | |ja = 死者たちの沼 |
| | |jaR =Shisha-tachi no numa |
| | |nl = Poelen van de Oude Doden |
| | |no = Bassenger av oldtidens døde |
| | |pl = Stawy pradawnych umarłych |
| | |pt = Poças dos Mortos Antigos |
| | |ptBR = Águas dos Mortos Ancestrais |
| | |ro = Gropile Morților Antici |
| | |ru = Заводи древних мертвецов |
| | |ruR =Zavodi drevnikh mertvetsov |
| | |sv = De Uråldriga Dödas Dammar |
| | |tr = Kadim Ölülerin Gölcükleri |
| }} | | }} |
| | | {{clr}} |
| ==Trivia== | | ==Navigation== |
| *A boss battle against [[the Swamp Guardian]] was considered for this level, but the idea never made it past the conceptual stage.
| |
| | |
|
| |
| {{MediEvil levels}} | | {{MediEvil levels}} |
|
| |
| [[it:Le Paludi dei Morti Viventi]]
| |
| [[Category:Levels]] | | [[Category:Levels]] |
| [[Category:Levels in MediEvil]] | | [[Category:Levels in MediEvil]] |
