The Haunted Ruins: Difference between revisions
m (Removing images.) |
DansFriend (talk | contribs) No edit summary |
||
| (7 intermediate revisions by the same user not shown) | |||
| Line 1: | Line 1: | ||
{{ | {{Pagination|[[The Haunted Ruins|MediEvil]]|[[Haunted Ruins|MediEvil: Resurrection]]}} | ||
| | {{Infobox level | ||
|name = The Haunted Ruins | |||
|aka = Castle Peregrin, Castle Gallowmere | |aka = Castle Peregrin, Castle Gallowmere | ||
| | |image = MediEvil1998-TheHauntedRuins-LoadingScreen.png | ||
| | |image2=MediEvil2019-TheHauntedRuins-LoadingScreen.png | ||
|levelnumber = 18. | |||
|chalice = Yes | |chalice = Yes | ||
|enemies = [[Shadow Demons]], [[Flying Demons]], [[Mace Knight]]s, [[Stone Golems]] | |enemies = [[Shadow Demons]], [[Flying Demons]], [[Mace Knight]]s, [[Stone Golems]] | ||
|nlevel = [[The Ghost Ship]] | |nlevel = [[The Ghost Ship]] | ||
|plevel = [[The Gallows Gauntlet]] | |plevel = [[The Gallows Gauntlet]] | ||
| | |music = [[City in the Clouds]] | ||
|music2019 = [[A Marrow Escape]] | |||
}} | }} | ||
{{ | {{LocationMediEvil | ||
|bgposition = 54% 12% | |||
|west = [[The Gallows Gauntlet]] | |west = [[The Gallows Gauntlet]] | ||
|northeast = [[The Ghost Ship]]}} | |northeast = [[The Ghost Ship]]}} | ||
{{Quote|Some say King Peregrin's castle has seen better days, but the Shadow Demons beg to differ. It's a lot more peaceful without all those pesky humans around.}} | {{Trophies| | ||
{{Trophy/MediEvil|King of Cups}} | |||
{{Trophy/MediEvil|Deathly Smorgasbord}} | |||
}} | |||
{{Quote|Some say King Peregrin's castle has seen better days, but the Shadow Demons beg to differ. It's a lot more peaceful without all those pesky humans around.|Loading screen description}} | |||
'''The Haunted Ruins''' is the eighteenth level of ''[[MediEvil]]''. The site was once [[King Peregrin]]'s castle, but has since fallen into ruin. It has also been taken over by the [[Shadow Demons]]. | |||
==Walkthrough== | ==Walkthrough== | ||
{{Empty section|Walkthrough}} | |||
==Book of Gallowmere== | |||
===Friendlies=== | |||
*[[King Peregrin]] | |||
*[[Captive Farmers]] | |||
*[[Chickens]] | |||
*[[Information Gargoyle]] | |||
*[[Merchant Gargoyle]] | |||
===Enemies=== | |||
*[[Shadow Demons]] | |||
*[[Mace Knights]] | |||
*[[Stone Golems]] | |||
==Inventory== | |||
{{Empty section}} | |||
==Intermissions== | |||
{{Empty section}} | |||
== | |||
=== | |||
{{ | |||
{{ | |||
==Books== | ==Books== | ||
{{ | {{Main|Books in MediEvil}} | ||
===Book 1=== | |||
Since the Farmers have been captured by the Shadow Demons the animals here have gone hungry. | Since the Farmers have been captured by the Shadow Demons the animals here have gone hungry. | ||
===Book 2=== | |||
The Farmers are being held in the courtyard. | The Farmers are being held in the courtyard. | ||
At the first sign of trouble the Shadow Demons will sacrifice the captives to the flames. Move quickly, slay the demons on guard and release the farmers. | At the first sign of trouble the Shadow Demons will sacrifice the captives to the flames. Move quickly, slay the demons on guard and release the farmers. | ||
===Book 3=== | |||
Long ago this was once the majestic Throne room of King Peregrin. Now foul demons stalk the corridors. The spirit of the King must be saddened indeed. | Long ago this was once the majestic Throne room of King Peregrin. Now foul demons stalk the corridors. The spirit of the King must be saddened indeed. | ||
===Book 4=== | |||
Sometimes the ghost of King Peregrin can be seen wandering these halls or sitting mournfully upon his throne. Find his crown and perhaps you can summon him. | Sometimes the ghost of King Peregrin can be seen wandering these halls or sitting mournfully upon his throne. Find his crown and perhaps you can summon him. | ||
===Book 5=== | |||
The castle was constructed on top of a dormant volcano. This great flood gate is all that stands between you and a very hot shower. | The castle was constructed on top of a dormant volcano. This great flood gate is all that stands between you and a very hot shower. | ||
===Book 6=== | |||
Hurry - the castle is about to be destroyed! The gates are locked, find an alternative means of travel! | Hurry - the castle is about to be destroyed! The gates are locked, find an alternative means of travel! | ||
===Book 7=== | |||
Hot scalding Oil! Burn your skeletal toes that will! Better find a way to close the oil vents before crossing. | Hot scalding Oil! Burn your skeletal toes that will! Better find a way to close the oil vents before crossing. | ||
==Gallery== | ==Gallery== | ||
{{Empty section|Gallery}} | {{Empty section|Gallery}} | ||
==In other languages== | |||
===''MediEvil'' (1998 original)=== | |||
{{Empty section|Languages}} | |||
===''MediEvil'' (2019 remake)=== | |||
{{OtherLanguages | |||
|ar = ”الأنقاض المسكونة” | |||
|arR ="al'anqad almaskunati" | |||
|bg = Призрачните развалини | |||
|bgR =Prizrachnite razvalini | |||
|cz = Strašidelné trosky | |||
|da = De Hjemsøgte Ruiner | |||
|de = Die Spukruinen | |||
|el = Τα Στοιχειωμένα Ερείπια | |||
|elR =Ta Stoicheioména Ereípia | |||
|es = Las Ruinas encantadas | |||
|esMX = Las Ruinas Encantadas | |||
|fi = Kummitusrauniot | |||
|fr = Les Ruines Hantées | |||
|hr = Uklete ruine | |||
|hu = A szellemjárta romok | |||
|it = Le Rovine infestate | |||
|ja = ペリグリン城 | |||
|jaR =Perigurin-jō | |||
|jaM = Castle Peregrin | |||
|nl = De Spookruïne | |||
|no = De hjemsøkte ruiner | |||
|pl = Nawiedzone ruiny | |||
|pt = Ruínas Assombradas | |||
|ptBR = As Ruínas Assombradas | |||
|ro = Ruinele Bântuite | |||
|ru = Руины с привидениями | |||
|ruR =Ruiny s privideniyami | |||
|sv = Den hemsökta ruinen | |||
|tr = Perili Harabeler | |||
}} | |||
==Navigation== | |||
{{MediEvil levels}} | {{MediEvil levels}} | ||
{{DEFAULTSORT:Haunted Ruins, The}} | {{DEFAULTSORT:Haunted Ruins, The}} | ||
[[Category:Levels]] | [[Category:Levels]] | ||
[[Category:Levels in MediEvil]] | [[Category:Levels in MediEvil]] | ||
Latest revision as of 22:57, 6 March 2024
| The Haunted Ruins | ||
|---|---|---|
 
| ||
| General information | ||
| AKA | Castle Peregrin, Castle Gallowmere | |
| Chalice | Yes | |
| Enemies | Shadow Demons, Flying Demons, Mace Knights, Stone Golems | |
| Music (original) | City in the Clouds | |
| Music (remake) | A Marrow Escape | |
| Chronological information | ||
| Level number | 18. | |
| Previous level | The Gallows Gauntlet | |
| Next level | The Ghost Ship | |
| Location on Land Map | ||||
|---|---|---|---|---|
| The Ghost Ship | ||||
| ↗ | ||||
| The Gallows Gauntlet | ← | |||
| Trophies | |
|---|---|
Collect all the chalice rewards. | |
Die 7 different ways. | |
|
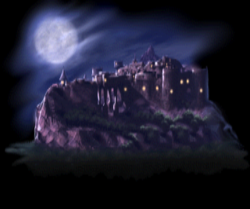
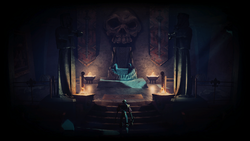
The Haunted Ruins is the eighteenth level of MediEvil. The site was once King Peregrin's castle, but has since fallen into ruin. It has also been taken over by the Shadow Demons.
Walkthrough
|
Book of Gallowmere
Friendlies
Enemies
Inventory
|
Intermissions
|
Books
- Main article: Books in MediEvil
Book 1
Since the Farmers have been captured by the Shadow Demons the animals here have gone hungry.
Book 2
The Farmers are being held in the courtyard.
At the first sign of trouble the Shadow Demons will sacrifice the captives to the flames. Move quickly, slay the demons on guard and release the farmers.
Book 3
Long ago this was once the majestic Throne room of King Peregrin. Now foul demons stalk the corridors. The spirit of the King must be saddened indeed.
Book 4
Sometimes the ghost of King Peregrin can be seen wandering these halls or sitting mournfully upon his throne. Find his crown and perhaps you can summon him.
Book 5
The castle was constructed on top of a dormant volcano. This great flood gate is all that stands between you and a very hot shower.
Book 6
Hurry - the castle is about to be destroyed! The gates are locked, find an alternative means of travel!
Book 7
Hot scalding Oil! Burn your skeletal toes that will! Better find a way to close the oil vents before crossing.
Gallery
|
In other languages
MediEvil (1998 original)
|
MediEvil (2019 remake)
| Language | Name | Meaning |
|---|---|---|
| Arabic | ”الأنقاض المسكونة” "al'anqad almaskunati" |
- |
| Bulgarian | Призрачните развалини Prizrachnite razvalini |
- |
| Croatian | Uklete ruine | - |
| Czech | Strašidelné trosky | - |
| Danish | De Hjemsøgte Ruiner | - |
| Dutch | De Spookruïne | - |
| Finnish | Kummitusrauniot | - |
| French (France) | Les Ruines Hantées | - |
| German | Die Spukruinen | - |
| Greek | Τα Στοιχειωμένα Ερείπια Ta Stoicheioména Ereípia |
- |
| Hungarian | A szellemjárta romok | - |
| Italian | Le Rovine infestate | - |
| Japanese | ペリグリン城 Perigurin-jō |
Castle Peregrin |
| Norwegian | De hjemsøkte ruiner | - |
| Polish | Nawiedzone ruiny | - |
| Portuguese (Brazil) | As Ruínas Assombradas | - |
| Portuguese (Portugal) | Ruínas Assombradas | - |
| Romanian | Ruinele Bântuite | - |
| Russian | Руины с привидениями Ruiny s privideniyami |
- |
| Spanish (LatAm) | Las Ruinas Encantadas | - |
| Spanish (Spain) | Las Ruinas encantadas | - |
| Swedish | Den hemsökta ruinen | - |
| Turkish | Perili Harabeler | - |